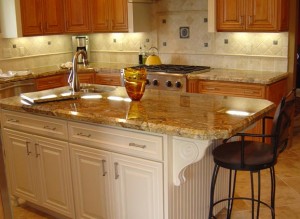
 There are many subtle things you can do to enhance your kitchen without spending thousands of dollars. We’ve given some tips for saving money on a kitchen remodel in the past, but in this article we’ll focus on one specific approach: installing a tile backsplash.
1) Prep the Area: start by turning off power to all appliances and removing face plates. Remove your range and install a temporary ledger. Then you’ll want to prep the surface area by roughing up the paint or prime any dark paint with a sealer-primer. You’ll then want to determine the how many sheets you need by finding the focal-point, measuring your tile sheets & marking where they should be cut, and noting appropriate position on the wall.
2) Mix & Apply: Start by mixing the thinset and then applying it with a v-notch trowel and leveling it with the notched side. Then smooth the notches. After that you’ll want to press the first sheet of tiles to the wall along the centerline. Make sure that you work from the bottom up. One tip for keeping the tiles even as you apply them is to gently hammer them down using a block. This will keep them even. Then wait 15-30 minutes for the tile to start to set.
3) Touch Up: Lightly wet the paper face with a damp sponge over about 5 to 10 minutes. This will cause water to absorb into the paper, releasing the glue. Then we’ll remove the paper face. Remember to keep your hands damp during this removal, so the adhesive doesn’t stick to them. Lastly, you’ll want to fill in tiles around receptacles and other obstacles. If you have to cut tiles for this work make sure you use two-wheel glass snippers. Once all the tiles are installed, let them sit for 48 hours, then clean them with a sponge and remove thinset.
4) Finishing Up: Start by grouting the area with pre-mixed grout. Then wet the tile with a sponge and use an epoxy grout float to push the grout into the joints. To remove any excess grout just pull the float across the tile diagonally. Then with a lightly dampened sponge clean the tiles. Lastly, you’ll want to caulk the edges and let the wall cure for several hours. Then you’re free to remove the ledger and re-install the range and appliances.
We’ve obviously simplified the process a bit, and we don’t recommend you take on this type of project without doing some more research. That said, this is one cost effective way to upgrade your kitchen. If you’re looking to compare do-it-yourself work to the cost of a full kitchen remodel then consider San Diego kitchen remodeling contractor Greyhound General. Give us a call at 800-568-7108 or fill out a form here to request your free consultation!
